Smart Fridge
I wrote this post about two and a half years ago, and now that I’ve decided to start writing again, I thought I’d begin with it before moving on to other upcoming projects.
I wondered which project to write about first. At first, I thought I’d start with the more recent ones, but in the end I decided to go more chronologically, to show the change and progress that happened over the years.
Some Background
Back in 12th grade (around 2015) I had quite a bit of free time, so I kept myself busy with different projects. I studied computer science at the 5-unit level, and there was an option to add another 5 units through a program at the Davidson Institute (https://davidson.weizmann.ac.il/programs/cs).
In 11th grade, we traveled about once a month to the Weizmann Institute, where we attended lectures on various computer science topics. I don’t remember much, but I do remember it was enriching and exposed me to new areas in the field.
In 12th grade, those who chose to continue could complete a final project worth 5 units, with a mentor assigned to guide them throughout the process.
Since I had a lot of free time, I decided to go for it, and I had plenty of big ambitions—as you’ll soon read.
Unlike many of my projects, this one was fairly well documented, mainly because we had to submit progress reports and a thick project binder. On top of that, email correspondence was still common back then, so I still have some exchanges with my mentor.
Honestly, it’s really fun to read this documentation today. I can practically feel the emotions I had at the time I wrote those updates.
Getting Started
Ever since I was little, I loved remote-controlled toys, especially flying ones. Over the years I bought several small RC helicopters, and their life cycle was always the same.
First, I’d really want one, then buy it with my (little) hard-earned money. I’d get super excited and enjoy every moment of flying it. Then reality would hit: the battery lasted just three minutes, and then it needed a full hour to recharge. Finally, I’d fly it a little too aggressively, crash it into a wall, break a part, and that would be the end of my romance with that helicopter…
By 12th grade, I had already started getting into the world of drones (which I’ll write about later).
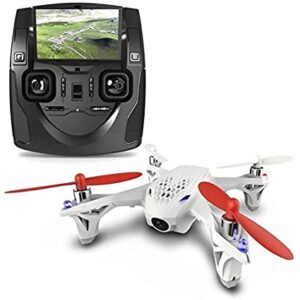
I had a Hubsan X4 107d
It was the first drone I bought with a camera that transmitted back to the remote. I absolutely loved the idea. I also bought plenty of spare batteries, so I could fly it often. It was great.
Back to the point: I wanted to do something related to drones, and I decided my project would be about controlling a drone’s movement using some object.
What I envisioned was holding a stick and pointing it in different directions, with the drone moving accordingly.
That sounded super cool to me, so I went for it without realizing just how complicated it would be. Even today, the project still looks very challenging, and it definitely would’ve pushed me to my limits.
Initial Research
The project was essentially divided into several parts:
- Controlling the drone itself – For this, I needed to understand how the drone receives information, what communication protocol it used, and how to transmit signals to it.
- Image processing – I needed to analyze the position and orientation of the object, and based on that, send the correct commands to the drone.
And of course, all of this had to happen fast enough for the drone to stay responsive in the air.
So I started researching—mainly browsing internet forums about drone control. I wanted to see if there was documentation on how it worked and whether it was possible to “pretend to be the remote” and send my own commands.
Looking back at my notes, I was happy to see that I had already started this research in July—great progress for the timeline!
Eventually, I found a post on RC Groups where someone had figured out the communication protocol. That meant it was possible to build your own transmitter to talk to the drone!
I was super excited, ordered the necessary parts, and decided to go down that path.
By around September the parts had arrived, and I submitted my project proposal, which looked something like this (maybe I’ll attach it as an image):
October
- Finish building the transmitter
- Successfully control the drone (without image processing)
- First version of image processing
December
- Complete the image processing software
- Connect the image processing to the drone control
January
- Finalize the connection between image processing and drone control
February
- Fix remaining issues
- Final polishing: optimization, bug fixes, code improvements
No doubt, the work plan looked perfect—I was set to finish the project a month before the deadline!
The Reality Check
By the end of October, I sent my mentor this message (quoting):
*"Recently I sat down and thought about it, and the more I dive into this project the more I realize I’ve taken on something far too big. I now understand the enormous complexity of it.
Therefore, I’ve decided not to continue with this project because it’s bound to fail within the given timeframe. Instead, I’d like to switch to the simpler idea with the fridge. The idea is to have a camera that records what goes in and out, so you can always know what’s inside."*
And after a few more emails, I officially switched to the smart fridge project.
I’m really glad I still have those emails—it helps me relive the exact frustration and urge to give up I felt back then.
The Smart Fridge
After that reality check, I switched to a different idea I had: the smart fridge.
The idea was to take a picture of the fridge every time something was put in or taken out, and then build a program that could create a gallery of all the items currently inside.
For example: you’d take a before-and-after picture sequence and extract the new item that appeared. (Insert example pictures).
At the time, the concept seemed super innovative—I hadn’t seen anything like it. This was back in 2015, when IoT (Internet of Things) wasn’t yet mainstream.
Only after finishing the project did I come across this article about Samsung’s first smart fridge launch.
I’m sure earlier examples existed, but for me it felt very new and motivating, like I was building something truly ahead of its time.
Of course, I created a nice work plan with a relaxed schedule. But over the following months, other priorities popped up—school, hobbies, and even the Skillz competition (which I’ll write about later). So, by Passover break (April 22–29), just before the extended deadline of April 30, I had made little progress.
One-Week Project
At that point, I didn’t know if I’d manage to finish at all. I even considered abandoning the project.
But eventually, I decided to dedicate the entire Passover break to it and see how far I could get.
The Solution Approach
The program’s goal was to identify the new items placed in the fridge and display them in a gallery.
The basic idea was simple: take a picture of the fridge, add an item, then take another picture. Compare the two images, and the difference would be the new item.
In practice, that’s what I ended up implementing—but the execution was a bit trickier.
Work Environment
The first challenge was the environment. I wrote the project in C++, though at the time I mostly programmed in Java.
Switching languages isn’t the hardest thing in the world if you already know one well, but still—I had to learn the new syntax and conventions.
The second challenge was image processing. For that, I used a library called OpenCV (Open Computer Vision). Originally developed by Intel, it later became open source. It includes a huge collection of computer vision functions with an easy-to-use interface. (It supports Java, Python, and C++).
Installing it shouldn’t have been a problem, but I ran into endless issues, and it took me a long time before I got it running.
This kind of step always frustrates me in projects—it feels like I’m spending time on technical setup instead of the actual project. But it’s part of the “grunt work” every project requires. Eventually, I managed to make it work.
The Actual Process
The next step was learning which OpenCV functions were relevant. There are countless things you can do with images, so I spent most of my time figuring out which tools applied to my problem. Luckily, the library’s documentation is excellent.
Here’s the pipeline I built:
- Subtract the two images
- Convert the result to grayscale
- Apply a threshold (pixels above a certain value turn white, others turn black)
- Apply erosion and dilation (helps separate objects more clearly)
- Run Canny edge detection (finds edges in the image)
- Use
findContoursto extract object boundaries - Use
boundingRectto wrap the object in a minimal rectangle - Take the largest rectangle (the added item), crop it, and save it to the gallery
(Insert image examples for each step)
Finishing the Project
After a full week of nonstop work during Passover, the project was complete, I could successfully extract the fridge items and get decent results.
Reflections and Insights
Image Processing
One big lesson: it’s really hard to make image processing work in general cases.
In this project, the software worked well on a specific image set. But with different lighting or object sizes, it would fail.
In that sense, the project was a little “cheaty”—the software claimed to do something broad, but in reality it was tailored for one set of images. Still, for the time, I felt it was a big achievement.
From my experience, image processing is a tough field. It requires deep knowledge and lots of experimentation.
While creating entirely new algorithms requires years of academic research, the amazing part is that many algorithms are openly available for anyone to use.
But even using existing tools, getting them to work reliably across cases is extremely challenging. To this day, I haven’t built an image processing project that truly worked across all inputs.
A Project Too Big for Me
I wanted to start with the drone story because it shows how the project really began. Looking back, the drone project was simply way too ambitious for me at the time (and maybe still a bit today).
In hindsight, my mentor could’ve been more realistic with me and told me straight up that it was too advanced, and I should start with something smaller.
This connects to a broader theme: in most of my projects, I didn’t have much guidance. On one hand, I love working independently and learning on my own. On the other, I could’ve benefited a lot from professional guidance to save time and effort.
That lack of guidance is partly why I write this blog—I’d like to provide that “helping hand” to others tackling their own projects.
When I start a project, I usually have a vision of the ideal finished product. That vision is important—it’s like a guiding light. But it can also hurt motivation, since it’s often hard to reach.
So, after forming the vision, I usually narrow it down into a few small, achievable goals.
That way, it feels realistic, and if I still have the drive afterward, I can keep building on it step by step.
Long-Term Projects
I’ve never really mastered long-term planning. Most of my projects don’t have deadlines, I set my own pace.
But I’ve found that planning too far ahead doesn’t work for me. I usually plan in terms of weeks or months at most. I don’t set rigid schedules—just a priority list of what I want to dive into.
Rebuilding the Project Today
When I wrote this post, I didn’t have pictures of the image-processing steps. I debated whether to even write about it, thinking it might feel shallow without that explanation.
So, I decided to recreate the project from scratch, based on my old documentation.
At first, I thought of using the original C++ code, but all I had was a Word copy. Copying and debugging it sounded painful.
So instead, I rewrote it from scratch in Python. And in just two hours—about 40 lines of code, I was done.
It was mind-blowing: a project that once took me months in 12th grade, with an entire week of nonstop effort, was now finished in an afternoon.
That progress came from my accumulated experience with image processing, having a ready development environment, and being much faster at troubleshooting issues.
Here’s the code for anyone interested
import cv2 as cv
import numpy as np
import glob
import os

def main():
    def nothing(x):
        pass
    cv.namedWindow('controls')
    cv.createTrackbar('r', 'controls', 110, 255, nothing)
    paths = glob.glob("images_fridge/*Copy*")

    for i in range(0,len(paths) - 1):
        img1 = cv.imread(paths[i])
        img1 = cv.resize(img1, (750, 540))
        img2 = cv.imread(paths[i+1])
        img2 = cv.resize(img2, (750, 540))
        img_diff = cv.absdiff(img1, img2)
        img_gray = cv.cvtColor(img_diff, cv.COLOR_BGR2GRAY)
        img3 = cv.imread(paths[i+1])
        img3 = cv.resize(img2, (750, 540))
        img4 = cv.imread(paths[i+1])
        img4 = cv.resize(img2, (750, 540))
        img_grey_threshold = cv.inRange(img_gray,110, 255)
        kernel = np.ones((7, 7), np.uint8)
        img_dilation = cv.dilate(img_grey_threshold, kernel, iterations=3)
        img_erosion = cv.erode(img_dilation, kernel, iterations=1)
        edged = cv.Canny(img_erosion, 30, 200)
        contours, hierarchy = cv.findContours(edged,
                                               cv.RETR_EXTERNAL, cv.CHAIN_APPROX_NONE)
        for c in contours:
            x,y,w,h = cv.boundingRect(c)
            if w*h > 7000:
                cv.rectangle(img4,(x,y),(x+w,y+h),(155,155,0),1)
                cropped_img = img2[y:y+h, x:x+w]
                cv.imshow('cropped_img', cropped_img)
                path = "images_cropped/{}".format(os.path.basename(paths[i]))
                cv.imwrite(path,cropped_img)

        cv.drawContours(img3, contours, -1, (0, 255, 0), 3)

        cv.imwrite("process/1.img1.jpg", img1)
        cv.imwrite("process/2.img2.jpg", img2)
        cv.imwrite("process/3.img_diff.jpg", img_diff)
        cv.imwrite("process/4.img_grey.jpg", img_gray)
        cv.imwrite("process/5.img_grey_thres.jpg", img_grey_threshold)
        cv.imwrite("process/6.Erosion.jpg", img_erosion)
        cv.imwrite("process/7.Dilation.jpg", img_dilation)
        cv.imwrite("process/8.edged.jpg", edged)
        cv.imwrite("process/9.Contours.jpg", img3)
        cv.imwrite("process/10.bounding_rect.jpg", img4)
        cv.imwrite("process/11.cropped_img.jpg", cropped_img)

        cv.imshow("img1", img1)
        cv.imshow("img2", img2)
        cv.imshow("img_diff",img_diff )
        cv.imshow("img_grey",img_gray)
        cv.imshow("img_grey_thres",img_grey_threshold)
        cv.imshow('Erosion', img_erosion)
        cv.imshow('Dilation', img_dilation)
        cv.imshow("edged",edged)
        cv.imshow('Contours', img3)
        cv.imshow('bounding_rect',img4)
        while True:
            k = cv.waitKey(1) & 0xFF
            if k == 27:
                break
        cv.destroyAllWindows()

if __name__ == '__main__':
    main()
Until the next project,
Roto